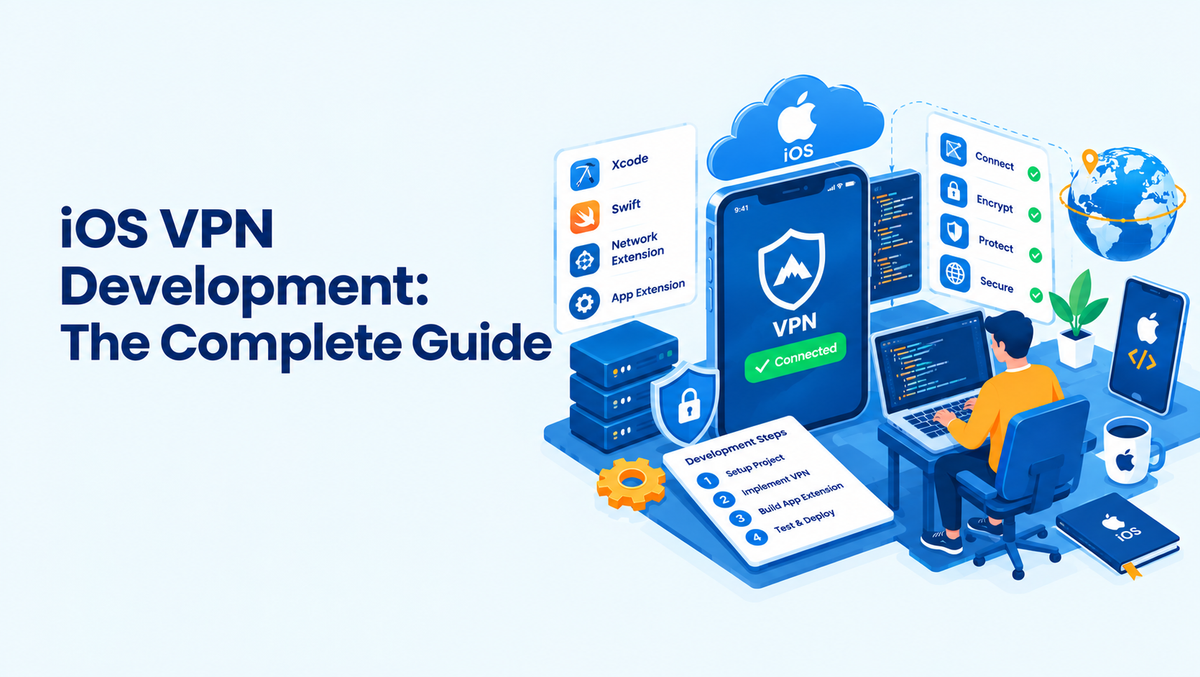
iOS VPN Development: The Complete Guide
A complete guide to iOS VPN development: Network Extension architecture, protocol choice, App Store rules, and business costs for VPN entrepreneurs.
Khan Muhammad Al Amin · September 28, 2026 · 19 min read
Building a VPN for iOS is a very different exercise from building one for Android. On Android, you install a VpnService, ask for a permission dialog, and start pumping packets. On iOS, you need an Apple-approved entitlement, an organization-level developer account, a separate app-extension process with tight memory limits, and an App Review team that treats VPN apps as a high-scrutiny category.
The upside is a more locked-down, predictable platform and a user base that pays for subscriptions at higher rates than Android. This guide covers both sides of the build: the engineering (Network Extension architecture, protocols, kill switch, DNS, reconnection, testing) and the business (compliance, App Store rules, costs, monetization, infrastructure). If you're also planning an Android client, read our companion piece, Android VPN Development: The Complete Guide, alongside this one.
1. Before You Write Code: Business and Compliance Prerequisites
On iOS, several of the biggest blockers have nothing to do with code. Sort these out first, because some take weeks.
An organization developer account is mandatory
App Store Review Guideline 5.4 requires apps offering VPN services to use the NEVPNManager API and to be published by a developer enrolled as an organization, not an individual. Apple's enrollment process for organizations requires a legal entity and a D-U-N-S number, which can take days to weeks to obtain and verify. Developers who start on a personal account and migrate later have reported friction, including automated spam flags on the migrated binary, so enroll correctly from day one.
The Network Extension entitlement
The Network Extension capability (com.apple.developer.networking.networkextension) with the packet-tunnel-provider value is required to ship a custom-protocol VPN. You enable it through your App ID in the developer portal. Plan for it in both targets: the main app and the tunnel extension each need matching entitlements and provisioning profiles.
Guideline in practice
Paraphrasing the requirements that matter most for a VPN startup:
- You must clearly disclose, on an app screen before the user buys or uses the service, what data you collect and how it's used.
- You may not sell, use, or disclose user data to third parties for any purpose, and your privacy policy must commit to that.
- You must not violate local laws. If you distribute in a territory that requires a VPN license, you must supply your license details in the App Review Notes.
- Violations can lead to removal from the App Store and from the Developer Program.
Practical consequences:
- Analytics SDKs are a risk. Many standard advertising and attribution SDKs collect identifiers that conflict with the "no third-party data" commitment. Audit every dependency, or use privacy-preserving first-party analytics.
- Marketing copy gets scrutinized. Apps have been rejected for metadata that encourages circumventing geographic restrictions or content limits. Lead with privacy, security on public Wi-Fi, and safety; avoid streaming-unblocking language in your App Store listing.
- Some territories need licenses or are effectively closed. Distribution in countries with VPN licensing regimes needs legal advice before you tick that storefront.
Export compliance
A VPN uses strong encryption, so you'll be asked export-compliance questions when submitting (the ITSAppUsesNonExemptEncryption key and App Store Connect questionnaire). Depending on your jurisdiction and encryption use, you may need documentation or an annual self-classification report. Bring in counsel here; getting it wrong delays releases.
2. How iOS VPNs Work: The Network Extension Architecture
On iOS, VPN functionality does not run as a long-running service inside the main app like Android’s VpnService. Instead, it is implemented through Apple’s Network Extension framework, with the VPN tunnel running in a separate app-extension process managed by iOS. The main app handles the UI, authentication, purchases, and VPN configuration, while the NEPacketTunnelProvider extension handles IP packets and runs the WireGuard or OpenVPN core. The main app and VPN extension communicate through system-supported mechanisms such as IPC, while shared configuration and keys can be accessed through App Groups and Keychain Access Groups. The tunnel extension then establishes the encrypted connection to the VPN server over UDP or TCP, depending on the VPN protocol and configuration.
Key implications:
- The tunnel survives your app being closed. The system launches and keeps the extension alive independently. You don't need a foreground-service notification like on Android.
- The app and extension don't share memory. Config, credentials, and state are exchanged through an App Group container, a shared Keychain access group, and sendProviderMessage IPC.
- The extension is memory-constrained. More on that in section 6.
- The Simulator can't run Network Extension tunnels. You need physical devices for all VPN testing.
Choosing your integration approach
iOS gives you four main ways to build VPN-related functionality, and the right one depends on what you're shipping.
- The quickest route is NEVPNManager with Apple's built-in IKEv2/IPsec client, which needs no custom extension and suits you if you want the fastest launch and are fine with IKEv2 alone.
- The standard choice for most VPN products is NETunnelProviderManager paired with NEPacketTunnelProvider, where you write custom tunnel code inside an extension and handle raw IP packets yourself, which lets you run WireGuard, OpenVPN, or custom and obfuscated protocols.
- If you're targeting enterprise or MDM-managed deployments that need Per-App VPN, NEAppProxyProvider is the fit, since it proxies traffic at the flow (TCP/UDP) level, including on a per-app basis.
- Finally, NEFilterProvider and NEDNSProxyProvider provide content filtering and DNS-level control, which makes them well suited to ad and tracker blockers and DNS features but not to full VPNs. In practice, most consumer VPNs use NEPacketTunnelProvider, sometimes also offering IKEv2 through NEVPNManager as an alternative protocol option.
3. Project Setup
Targets and capabilities
- Create the main app target.
- Add a Network Extension target, choosing Packet Tunnel Provider.
- Enable Network Extensions (Packet Tunnel) in Signing & Capabilities for both targets.
- Enable the same App Group and Keychain Sharing group on both targets.
- Match bundle IDs: the extension's bundle ID must be prefixed by the app's (for example com.enova.vpn and com.enova.vpn.PacketTunnel).
Creating and starting a tunnel configuration from the app
import NetworkExtension
final class VPNController {
func configureAndConnect(serverAddress: String, wgConfig: String) async throws {
let manager = NETunnelProviderManager()
let proto = NETunnelProviderProtocol()
proto.providerBundleIdentifier = "com.enova.vpn.PacketTunnel"
proto.serverAddress = serverAddress // shown in Settings; not used for routing
proto.providerConfiguration = ["wgQuickConfig": wgConfig] // avoid embedding secrets here (see section 11)
proto.includeAllNetworks = false // see kill switch discussion
manager.protocolConfiguration = proto
manager.localizedDescription = "Enova VPN"
manager.isEnabled = true
try await manager.saveToPreferences() // triggers the system "Add VPN Configurations" prompt (first time)
try await manager.loadFromPreferences() // required after saving, before starting; a classic gotcha
try manager.connection.startVPNTunnel()
}
}
The first saveToPreferences() shows a system alert asking the user to allow the VPN configuration. Its wording is controlled by iOS, not by you, so prepare users with an in-app explanation screen beforehand (which also supports your Guideline 5.4 disclosure).
4. Building the Packet Tunnel Provider
The extension subclasses NEPacketTunnelProvider. Two jobs: tell the system what the virtual interface looks like, and shuttle packets.
Configuring the virtual interface
import NetworkExtension
class PacketTunnelProvider: NEPacketTunnelProvider {
override func startTunnel(options: [String : NSObject]?,
completionHandler: @escaping (Error?) -> Void) {
// tunnelRemoteAddress is informational; the actual server IP must be excluded from the tunnel by the OS
let settings = NEPacketTunnelNetworkSettings(tunnelRemoteAddress: "203.0.113.10")
let ipv4 = NEIPv4Settings(addresses: ["10.8.0.2"], subnetMasks: ["255.255.255.255"])
ipv4.includedRoutes = [NEIPv4Route.default()] // send all IPv4 through the tunnel
settings.ipv4Settings = ipv4
let ipv6 = NEIPv6Settings(addresses: ["fd00:8::2"], networkPrefixLengths: [128])
ipv6.includedRoutes = [NEIPv6Route.default()] // never leave IPv6 unrouted (leak vector)
settings.ipv6Settings = ipv6
let dns = NEDNSSettings(servers: ["10.8.0.1"])
dns.matchDomains = [""] // empty string = resolve ALL domains via tunnel DNS
settings.dnsSettings = dns
settings.mtu = 1280 // conservative; tune per protocol overhead
setTunnelNetworkSettings(settings) { [weak self] error in
if let error = error { completionHandler(error); return }
self?.startPacketPumps()
completionHandler(nil)
}
}
}
Note matchDomains = [""]: without it, iOS may resolve some domains outside the tunnel DNS, producing DNS leaks.
The packet loop
packetFlow hands you raw IP packets. If you embed a full engine like WireGuardKit, it handles this internally; if you build a custom transport, the shape is:
private func startPacketPumps() {
readFromTUN()
readFromNetwork()
}
private func readFromTUN() {
packetFlow.readPackets { [weak self] packets, protocols in
guard let self = self else { return }
for packet in packets {
let encrypted = self.crypto.encapsulate(packet)
self.transport.send(encrypted) // NWConnection over UDP/TCP
}
self.readFromTUN() // re-arm; readPackets is one-shot
}
}
private func deliverToTUN(_ plaintextPackets: [Data]) {
let protocols = plaintextPackets.map { pkt -> NSNumber in
// first nibble of an IP packet: 4 = IPv4, 6 = IPv6
(pkt.first ?? 0) >> 4 == 6 ? NSNumber(value: AF_INET6) : NSNumber(value: AF_INET)
}
packetFlow.writePackets(plaintextPackets, withProtocols: protocols)
}
Use Network.framework (NWConnection) rather than BSD sockets for the outer transport: it handles path changes and gives you better battery behavior on cellular.
Talking to the extension from the app
// App side
if let session = manager.connection as? NETunnelProviderSession {
try session.sendProviderMessage("status".data(using: .utf8)!) { response in
// parse tunnel stats, handshake time, bytes transferred, etc.
}
}
// Extension side
override func handleAppMessage(_ messageData: Data, completionHandler: ((Data?) -> Void)?) {
completionHandler?(currentStatsJSON())
}
5. Choosing a Protocol for iOS
For iOS VPN development, WireGuard can be implemented using wireguard-apple or the WireGuardKit Swift package, which wraps wireguard-go. It offers fast handshakes, low battery consumption, a small codebase, and strong roaming capabilities. However, WireGuard is UDP-only by design, does not provide built-in traffic obfuscation, and requires developers to build their own key provisioning and management system.
IKEv2/IPsec is available natively on iOS through NEVPNManager and NEVPNProtocolIKEv2, making it one of the simplest options to integrate because it requires little or no custom protocol implementation. It benefits from kernel-level cryptography and MOBIKE, which helps maintain connections when users switch between networks. Its trade-offs are reduced flexibility, greater protocol identifiability, and fewer options for customizing server-side behavior.
OpenVPN can be integrated into iOS applications using community libraries and OpenVPN 3 Core-based adapters. Its key strengths include maturity and the ability to operate over TCP/443, which can be useful in networks where UDP connectivity is restricted. However, OpenVPN generally has higher memory and battery requirements and introduces the highest implementation complexity within iOS's constrained VPN extension environment.
Recommendation for a new commercial VPN: ship WireGuard as the default, offer IKEv2 as a low-effort fallback, and add an obfuscated transport later if you target restrictive networks. Skip OpenVPN unless customers demand it, because iOS's extension memory constraints make it the most painful.
Integrating WireGuardKit (sketch)
import WireGuardKit
class PacketTunnelProvider: NEPacketTunnelProvider {
private lazy var adapter = WireGuardAdapter(with: self) { level, message in
os_log("%{public}@", message) // never log user traffic or IPs
}
override func startTunnel(options: [String : NSObject]?,
completionHandler: @escaping (Error?) -> Void) {
guard let config = loadTunnelConfiguration() else {
completionHandler(PacketTunnelError.missingConfig); return
}
adapter.start(tunnelConfiguration: config) { adapterError in
completionHandler(adapterError)
}
}
override func stopTunnel(with reason: NEProviderStopReason,
completionHandler: @escaping () -> Void) {
adapter.stop { _ in completionHandler() }
}
}
WireGuardKit handles interface configuration, wireguard-go lifecycle, and endpoint re-resolution. Your responsibility: config generation, key management, and resilience logic around it.
6. The Memory Ceiling: the Constraint That Shapes Everything
Packet tunnel extensions run under a strict memory limit; exceed it and iOS terminates the extension with no warning, which users experience as "the VPN randomly disconnects." Historically the cap was about 15 MB and has reportedly risen on newer iOS versions, but treat exact numbers as approximate and always profile on your oldest supported device.
Practical rules:
- Prefer compact cores (WireGuard's Go implementation is comparatively lean; heavier stacks need tuning).
- If embedding Go, tune the runtime's garbage collector and memory limit (GOGC, debug.SetMemoryLimit) so the heap stays well under the ceiling.
- Don't load large blocklists, server lists, or SDKs into the extension. Keep the extension minimal; do everything else in the app.
- Avoid unbounded packet queues; apply backpressure.
- Use Instruments (Allocations and VM Tracker) while attached to the extension process under realistic throughput loads, not idle tests.
7. Kill Switch, On-Demand, and Leak Protection
Kill switch via includeAllNetworks
Setting includeAllNetworks = true on the protocol tells iOS to send all traffic through the tunnel and block traffic if the tunnel is down, which is the closest thing iOS has to an OS-level kill switch.
proto.includeAllNetworks = true
proto.enforceRoutes = true // routes you define take priority over local routing rules
proto.excludeLocalNetworks = true // keep AirPlay, printers, and LAN devices working
Trade-offs to design around:
- Some system services (for example cellular services and push-related traffic) have historically been exempt or required special handling, and newer iOS versions add exclusion flags for these. Test on current and older iOS releases.
- With includeAllNetworks on, the tunnel must reconnect fast: any dead-tunnel period means no connectivity at all, and users will blame your app.
- Expose the kill switch as a user setting with a plain-language explanation, not a silent default.
On-Demand rules (auto-connect)
let connectRule = NEOnDemandRuleConnect()
connectRule.interfaceTypeMatch = .any
let trustedWifi = NEOnDemandRuleDisconnect()
trustedWifi.interfaceTypeMatch = .wiFi
trustedWifi.ssidMatch = ["HomeNetwork"]
manager.onDemandRules = [trustedWifi, connectRule] // first matching rule wins
manager.isOnDemandEnabled = true
On-demand rules power features like "auto-connect on untrusted Wi-Fi" and "always on," and they're a strong retention lever.
DNS protection
Beyond matchDomains = [""], iOS 14+ supports encrypted DNS settings inside the tunnel:
let doh = NEDNSOverHTTPSSettings(servers: [])
doh.serverURL = URL(string: "https://dns.example-enova.net/dns-query")
settings.dnsSettings = doh
Also make sure your DNS resolver is reachable only inside the tunnel, and that IPv6 has routes and DNS coverage, since IPv6 is the most commonly missed leak path.
8. Split Tunneling: What iOS Does and Doesn't Allow
This is the biggest feature gap versus Android. Consumer apps cannot do per-app split tunneling on iOS. Per-app VPN (NEAppRule) requires MDM-managed devices, so it's an enterprise feature, not a consumer one.
What you can do:
- Route-based split tunneling: configure includedRoutes and excludedRoutes on NEIPv4Settings / NEIPv6Settings to include or exclude IP ranges (for example, exclude a country's ranges or a specific streaming/banking CIDR list).
- Domain-based approximation: resolve chosen domains via your own resolver and dynamically manage excluded routes. It's fiddly and fragile with CDNs.
- excludeLocalNetworks for LAN access.
Be honest in your marketing: state that iOS split tunneling is route-based, not app-based. Overpromising here creates support tickets and bad reviews.
9. Reconnection, Network Changes, and Sleep
Because the tunnel extension is system-managed, resilience means responding correctly to system callbacks:
- Observe connectivity with NWPathMonitor inside the extension and trigger re-handshake when Wi-Fi/cellular flips.
- Set reasserting = true while re-establishing the tunnel so iOS knows the interface is temporarily down instead of tearing everything down.
- Implement sleep(completionHandler:) and wake() to pause and resume keepalives cleanly.
- Use WireGuard's persistent keepalive (typically ~25 seconds) to survive carrier NAT timeouts.
- Handle stopTunnel(with:) reasons and call cancelTunnelWithError(_:) only when you truly can't recover.
- Re-resolve the server hostname on reconnect, so DNS-based load balancing and server failover work.
- Build server failover: if the primary endpoint doesn't handshake within a few seconds, fall back to an alternate IP or transport.
10. Testing Strategy
- Physical devices only. Test a matrix across your oldest supported iPhone (for memory pressure) and the latest hardware, on the oldest and newest supported iOS versions.
- Debug the extension. In Xcode, use Debug → Attach to Process and select the extension. Use os_log with Console.app and, when needed, a sysdiagnose for hard-to-reproduce failures.
- IPv6-only / NAT64 networks. Apple's App Review tests on IPv6-only networks, so a client that hard-codes IPv4 addresses can fail review. Verify with a NAT64 test network (macOS Internet Sharing supports this).
- Leak testing: DNS, IPv6, and WebRTC leak checks; kill switch validated by toggling airplane mode, switching Wi-Fi to cellular mid-session, and dropping the server connection.
- Throughput and battery: measure tunnel throughput against direct throughput, and watch CPU and battery over long sessions. Users notice battery drain more than a few Mbps.
- TestFlight beta: run a real-world beta across carriers and countries before launch; carrier behavior varies enormously.
11. Security Hardening
- Store secrets in the Keychain, using a shared keychain access group so the extension can read WireGuard private keys and auth tokens. Prefer referencing credentials by persistent Keychain reference rather than placing secrets in providerConfiguration (which is stored in the VPN configuration).
- Generate WireGuard keys on-device; send only the public key to your API.
- Pin certificates for your control-plane API (auth, server list, key registration).
- Zero logging by design: no traffic logs, no connection timestamps tied to identity. This isn't just marketing; it's required for your Guideline 5.4 promises to hold up.
- Protect against tampering with App Attest or DeviceCheck for API abuse prevention and account fraud, without collecting hardware identifiers you don't need.
- Rotate keys periodically and support revocation without requiring app updates.
12. App Store Submission Checklist
- Organization developer account enrolled and Network Extension entitlement approved.
- Pre-purchase data disclosure screen matching your privacy policy and App Privacy nutrition labels exactly.
- In-app explanation before the system VPN-permission prompt.
- Privacy policy stating no selling, use, or disclosure of user data to third parties.
- App Review Notes: test account credentials, any territorial license details, and a short explanation of how to trigger the VPN.
- Export compliance answers completed.
- Metadata free of "bypass restrictions" or streaming-unblocking claims.
- A working, reviewable experience: reviewers must be able to connect without hitting a paywall wall or waiting on manual approval.
Common rejection reasons: vague or missing data-use disclosure, third-party analytics or ad SDKs, misleading marketing claims, crashes on IPv6-only networks, and a subscription paywall that blocks the reviewer from verifying the VPN functions.
13. Business Model, Costs, and Timeline
Monetization
- Subscriptions via StoreKit 2 are the standard: monthly, annual, and multi-year plans with free trials or introductory offers. Annual plans usually dominate revenue.
- Apple's standard commission is typically 30%, dropping to 15% for subscribers after their first year, and 15% for developers in the Small Business Program. Rules and alternative-payment options vary by region and change over time, so confirm current terms before modeling revenue.
- Consider a freemium tier (limited servers or data) to drive installs, but watch server cost per free user carefully.
- Cross-platform accounts (one subscription usable on iOS, Android, desktop) raise lifetime value and reduce churn; design your backend entitlement system for this from the start.
Indicative cost and timeline (planning ranges, not quotes)
An iOS VPN project typically moves through four major phases, with some activities running in parallel. The first phase is discovery and compliance, which covers organization enrollment, required entitlements, legal considerations, and privacy policy preparation. This phase typically takes 2–6 weeks and is generally handled by the founder and legal counsel, with development preparation potentially happening alongside it.
The iOS MVP phase then focuses on building the app shell, integrating the WireGuard tunnel, implementing authentication and in-app purchases, and supporting an initial 5–10 server locations. This phase typically takes around 8–14 weeks and requires one to two iOS engineers and one designer.
In parallel with the iOS MVP, the backend development phase covers server provisioning, peer and key management APIs, authentication, and billing entitlements. This work typically takes 6–12 weeks and is handled by one to two backend or DevOps engineers.
Finally, the project moves into hardening and beta testing, which typically takes another 4–8 weeks. This phase includes implementing features such as a kill switch and on-demand VPN behavior, conducting leak tests, preparing the app for TestFlight, and going through App Review. The entire development team, supported by QA, typically participates in this final phase to identify and resolve issues before the public release.
A lean team in a mid-cost region might land an iOS-plus-backend MVP in the low-to-mid six figures (USD); premium-market agencies cost more. Ongoing costs matter just as much: server bandwidth and hosting, support, payment fees, audits, and customer acquisition usually outweigh the initial build.
Backend and infrastructure essentials
- Server fleet across strategic locations, on providers with good bandwidth pricing and peering; consider RAM-only server configurations to strengthen no-logs claims.
- Provisioning API that registers a device's public key, allocates a tunnel IP, and pushes peers to servers without exposing user identity.
- Auth and entitlements (accounts or anonymous account numbers), validating App Store receipts or StoreKit 2 transactions server-side.
- Monitoring for server load, handshake success rates, and regional block detection.
- Independent security audit and transparency reporting: in the VPN market, trust is the product, and audits are a real conversion lever.
Go-to-market notes
- App Store optimization matters: iOS VPN keywords are brutally competitive. Focus on privacy, public Wi-Fi safety, and specific use cases like travel and remote work.
- Publish a plain-English no-logs policy and back it with audits.
- Track connection success rate, time-to-connect, crash-free sessions, and trial-to-paid conversion. Those four metrics predict retention better than download counts.
14. iOS vs Android VPN Development at a Glance
The underlying VPN architecture differs significantly between iOS and Android. On iOS, VPN apps are built around the Network Extension framework, specifically NEPacketTunnelProvider, which runs in a separate, system-managed extension process. Android uses the VpnService API, which typically runs within the app's foreground service.
The platforms also differ in their approval and permission requirements. iOS requires an Apple VPN entitlement and an organization account, while Android generally uses a standard permission dialog. iOS imposes a strict memory ceiling on VPN extensions, whereas Android generally provides more generous memory resources.
Per-app split tunneling is another major difference. On iOS, consumer VPN apps generally use route-based configurations, while per-app VPN functionality is primarily associated with MDM-managed deployments. Android provides more direct support through addAllowedApplication and addDisallowedApplication.
For a kill switch, iOS can use includeAllNetworks, while Android can combine the system's “Block connections without VPN” option with application-level logic. Background operation also differs: iOS relies heavily on the system to manage the VPN extension, whereas Android VPN apps typically use a foreground service, with behavior potentially affected by individual device manufacturers' battery-management policies.
Testing requirements are different as well. iOS VPN development requires physical-device testing for important functionality, while Android emulators can be used for some portions of VPN development, although real-device testing remains important. Finally, both platforms have store-review requirements, but they differ in emphasis: iOS has strict App Store review requirements, including Guideline 5.4, while Android apps must comply with Google Play policies and Data Safety declaration requirements.
15. Your Build Roadmap
- Weeks 0–4: Enroll the organization, request the entitlement, get legal input on data handling and target territories.
- Weeks 2–8: Stand up a minimal WireGuard server and provisioning API; build the extension with WireGuardKit and get packets flowing on a physical device.
- Weeks 8–12: Add auth, StoreKit 2 subscriptions, server list, and the pre-purchase disclosure screen.
- Weeks 12–16: Layer in kill switch, on-demand rules, DNS protection, reconnection logic, and failover.
- Weeks 16–20: Run the leak-test matrix, IPv6-only testing, TestFlight beta, and an App Review dry run.
- Post-launch: Add obfuscated transports, multi-hop, additional protocols, and an external audit.
Most first-time VPN teams underestimate two things: how much engineering goes into reconnection resilience, and how much ongoing cost lives in servers and support rather than in the app itself. Get those two right, and the iOS client becomes your most profitable platform.